
Build a Ladder End Table
Free DIY Woodworking Plans
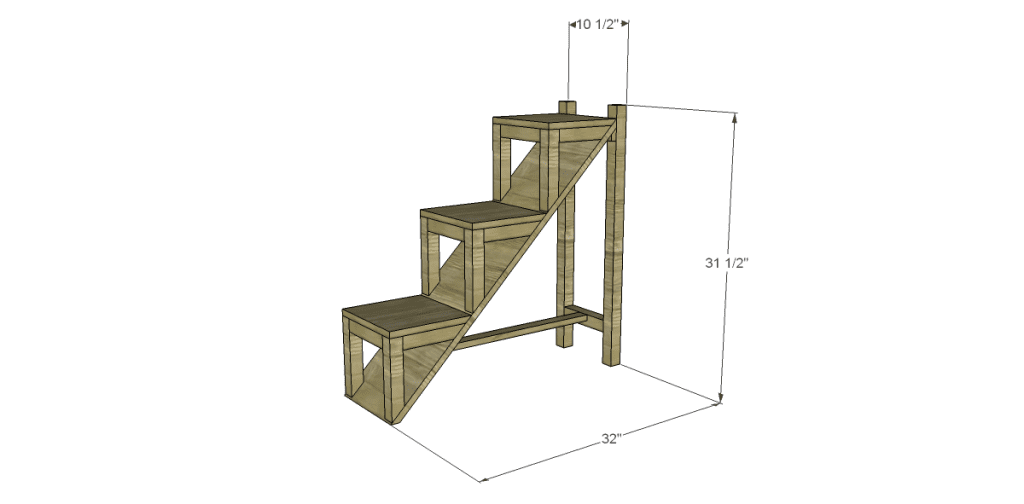
Wow, have you seen these amazing free DIY woodworking plans for building a Ladder End Table? It’s such a cool piece of furniture that you can use to stack and show off all your favorite things like books, plants, and photos. The best part is, it’s super easy and affordable to make! That’s definitely a big plus in my book!

Materials:
- 1-1/4″ pocket hole screws
- 2-1/2″ pocket hole screws
- 2″ screws
- 1-1/4″ brad nails
- Edge banding, optional
- Finishing supplies
Lumber:
- 2 – 1×2 at 8′
- 2 – 2×2 at 8′
- 1 – 2′ x 4′ sheet of 3/4″ plywood
Cut List:
- 2 – 2×2 at 31-1/4″ – Legs
- 1 – 1×2 at 10-1/2″ – Shelf Support
- 1 – 2×2 at 7-1/2″ – Stretcher
- 1 – 3/4″ plywood at 10-1/2″ x 10-1/2″ x 42-3/4″ – Large Shelf
- 1 – 1×2 at 24-5/8″ – Shelf Stretcher
- 6 – 1×2 at 7-3/4″ – Shelf Frame Side
- 3 – 1×2 at 7-1/2″ – Shelf Frame Front
- 6 – 2×2 at 9″ – Shelf Frame Leg
- 3 – 3/4″ plywood at 10″ x 10-1/2″ – Shelves
Step One
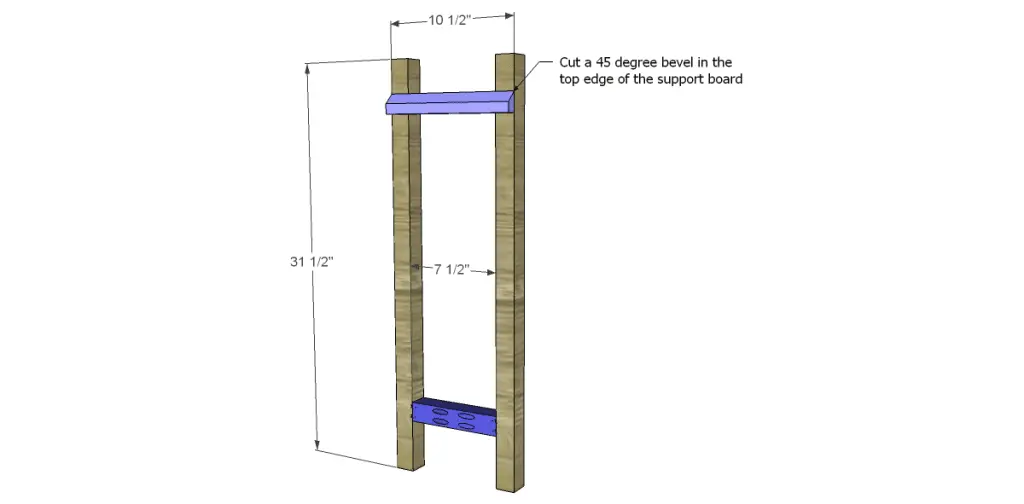
Cut the pieces for the legs, the 2×2 stretcher, and the shelf support. Drill pocket holes at each end of the stretcher and secure to the legs as shown using glue and 2-1/2″ pocket hole screws.
Cut a 45 degree bevel in one long edge of the shelf support. Secure the support to the legs using glue and countersunk 2″ screws.
Step Two
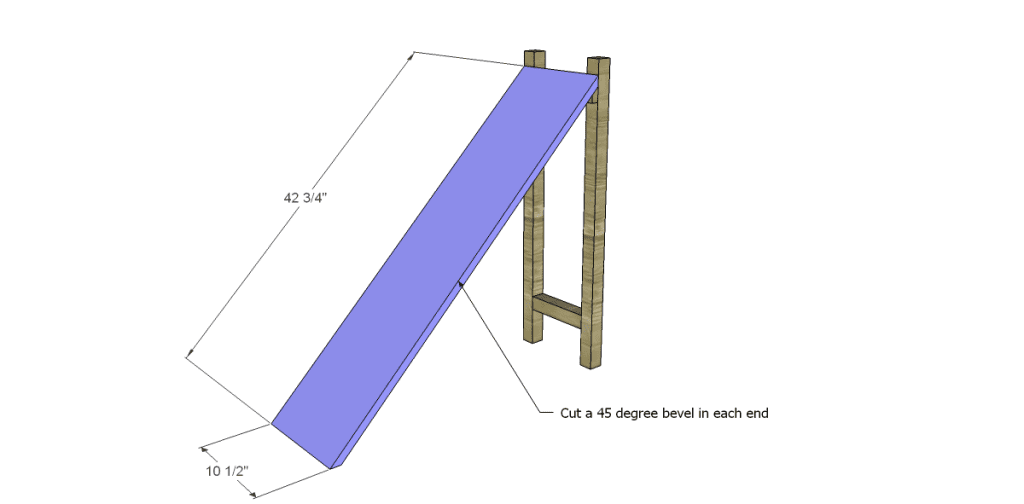
Cut the piece for the large shelf. Cut a 45 degree bevel in each end of the shelf. Secure to the shelf support using glue and toenailed 2″ screws.
Step Three
Cut the piece for the lower stretcher and drill pocket holes in one end. Cut a 45 degree bevel in the other end. Secure the straight end to the leg stretcher using glue and 1-1/4″ pocket hole screws. The top of the stretcher will be flush with the top of the leg stretcher. Secure the beveled end to the shelf using glue and 1-1/4″ brad nails.

Step Four
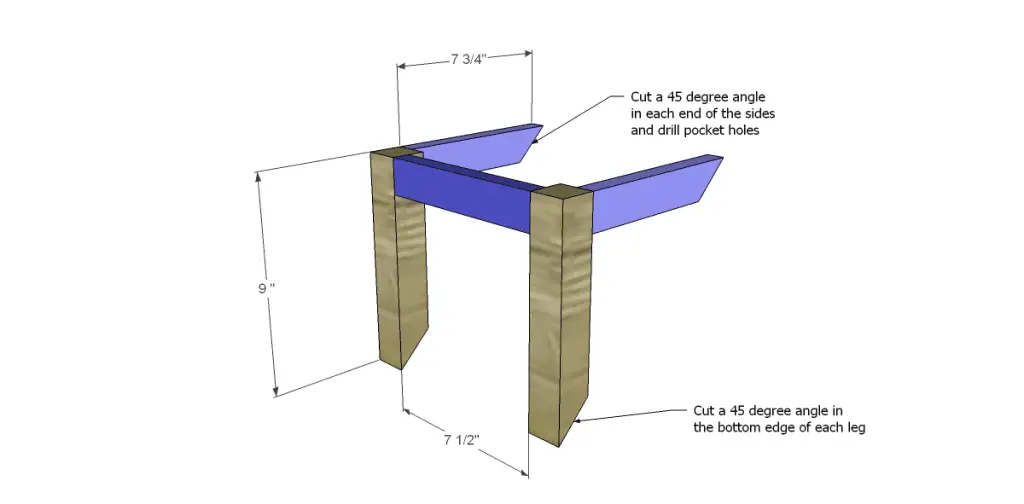
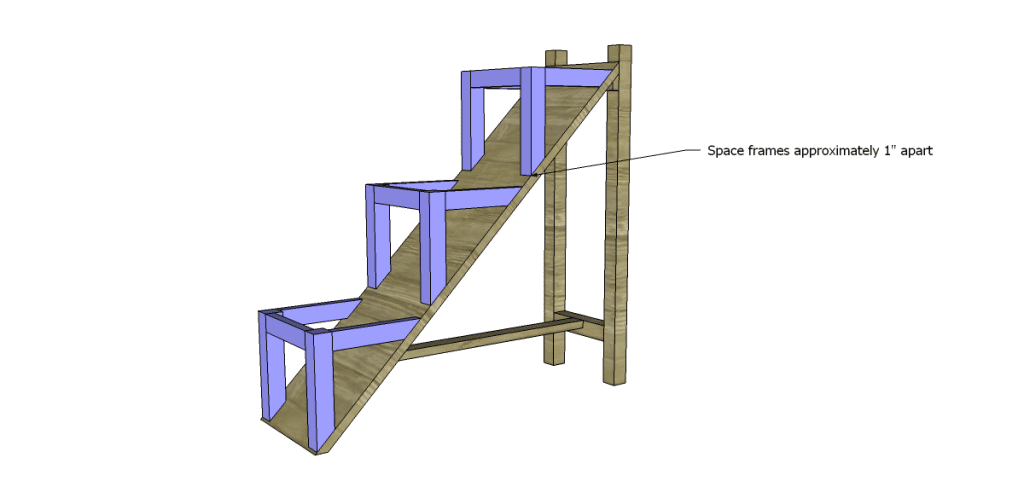
Cut the pieces for the small shelf frames. Cut a 45 degree bevel in one end of each leg, as well as one end of each side piece. Drill pocket holes in each end of the front frame pieces, as well as each end of the side pieces – including the mitered ends! Secure to the large shelf using glue and 1-1/4″ pocket hole screws through the pocket holes in the mitered ends. Secure the legs to the shelf using glue and countersunk 2″ screws through the bottom into the legs. Space the frames so there is at least 1″ between the leg and the side piece of the next frame.
 Step Five
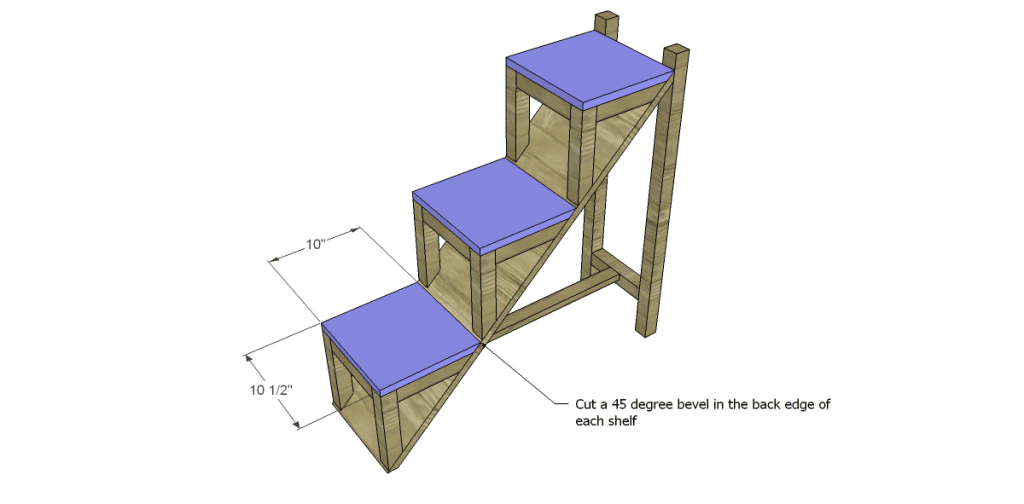
Cut the pieces for the small shelves. Cut a 45 degree bevel in the back edge of each shelf. Secure to the frames using glue and 1-1/4″ brad nails.
Finish as desired!
The free DIY woodworking plans to build a Ladder End Table would create a great table to store clean towels and toiletries in the bathroom, as well as a place to organize shoes or backpacks in an entryway. Have questions? Let me know at cher {at} designsbystudioc {dot} com!
Originally posted 2013-08-09 08:00:37.
[…] this unique ladder end table using these free step-by-step woodworking […]